To repair a kayak crack, clean the area thoroughly, apply marine-grade epoxy, and let it cure completely. Repairing a kayak crack is essential to prevent further damage and ensure safe paddling experiences.
It is important to act promptly to fix any cracks to maintain the structural integrity of your kayak and avoid water leakage. By following these steps, you can successfully repair a crack in your kayak and enjoy many more adventures on the water with confidence and peace of mind.
Identifying The Crack
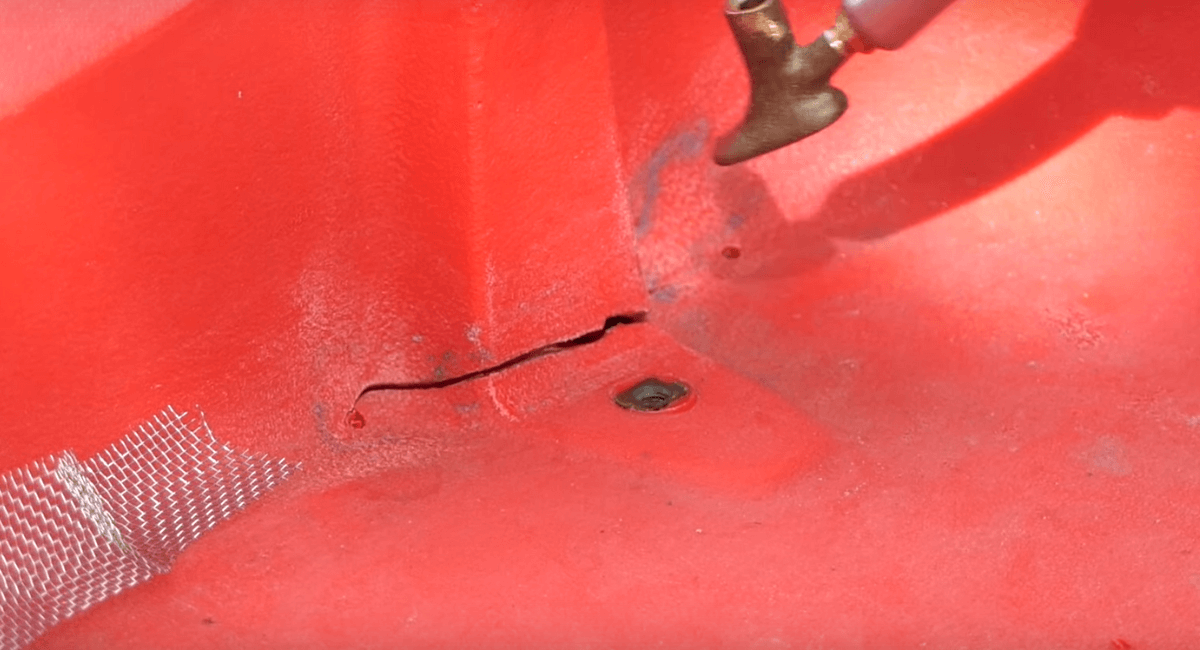
When it comes to repairing a kayak crack, the first step is identifying the crack. Before proceeding with any repairs, it’s crucial to pinpoint the exact location and extent of the damage.
Visible Signs
Visible signs of a crack may include fractures or breaks in the hull. These can often be spotted by carefully inspecting the surface of the kayak.
Leaks And Water Testing
Another way to identify a crack is through water testing. Fill the kayak with water and observe if any leaks emerge. This method helps determine the severity of the crack.
Preparing The Kayak

Cleaning the Area:
Clean the crack area with a mild soap solution using a soft cloth.
Remove any debris or dirt that may interfere with the repair process.
Drying the Surface:
Thoroughly dry the cleaned area with a towel to ensure a good bond.
Make sure no moisture remains, as it can affect the repair adhesion.
Choosing The Repair Material
Kayaks are prone to cracks over time, and it’s crucial to select the right material for repairing them to ensure longevity and durability. Choosing the right repair material is crucial for a successful kayak crack repair. Considerations for material selection include the type of repair kits and other important factors that can affect the repair process.
Types Of Repair Kits
Before getting into the material selection, it’s important to understand the types of repair kits available for kayak crack repairs. There are two main types of repair kits: epoxy resin-based kits and plastic welding kits. Epoxy resin-based kits are suitable for repairing cracks in fiberglass or composite kayaks, while plastic welding kits are ideal for repairing cracks in polyethylene or plastic kayaks. Understanding the type of kayak you have and the material it’s made of will help you choose the appropriate repair kit.
Considerations For Material Selection
When selecting a repair material for your kayak crack, there are several considerations to keep in mind. These include the compatibility of the material with the kayak’s construction, the strength and durability of the material, and its ability to withstand water exposure. Additionally, the ease of application and the availability of the repair material should also be taken into account. Choosing a material that meets these considerations will ensure a successful and long-lasting repair.
Repairing The Crack
Discover the secrets to fixing a kayak crack with these step-by-step instructions. Learn how to repair the damage and get back on the water in no time.
Repairing the Crack If you’ve noticed a crack in your kayak, it’s important to address it as soon as possible to prevent further damage and ensure your safety on the water. Repairing a kayak crack may seem daunting, but with the right tools and techniques, you can easily fix the issue yourself. In this section, we’ll guide you through the process of repairing the crack, from filling it to applying a patch. Filling the Crack To begin the repair process, you’ll first need to fill the crack in your kayak. This step is crucial as it helps to strengthen the damaged area and prevent water from seeping in. Here’s how you can fill the crack:
1. Clean the crack: Start by thoroughly cleaning the crack using a mild detergent and water. Ensure that the area is free from any dirt, debris, or grease.
2. Sand the area: Gently sand the area around the crack using fine-grit sandpaper. This will help create a smooth surface for the patching material to adhere to.
3. Apply a marine-grade epoxy: Use a marine-grade epoxy that is specifically designed for use with kayaks. This type of epoxy is durable and water-resistant, making it ideal for repairing kayak cracks. Follow the manufacturer’s instructions to mix the epoxy and apply it to the crack using a small brush.
4. Allow it to cure: Give the epoxy sufficient time to cure. This usually takes a few hours, but you should refer to the manufacturer’s instructions for the exact curing time. Applying the Patch Once the epoxy has cured, you can proceed with applying a patch to reinforce the repaired crack.
Here’s how you can apply the patch:
1. Cut the patch material: Measure the size of the crack and cut a patch material slightly larger than the area. You can use fiberglass cloth or carbon fiber cloth as patch material, as they are strong and lightweight.
2. Apply epoxy to the patch material: Using the same marine-grade epoxy, apply a thin layer onto the patch material. Make sure to coat it evenly.
3. Place the patch over the crack: Carefully place the patch over the repaired crack, ensuring that it covers the entire area. Gently press down to remove any air bubbles and to ensure a secure bond.
4. Allow it to cure: Let the patch cure completely according to the manufacturer’s instructions. This typically takes a few hours. By following these steps, you can effectively repair a crack in your kayak and restore its structural integrity. It’s important to note that if the crack is severe or extends to multiple areas, it may be best to seek professional assistance. Regularly inspecting your kayak for any signs of damage and addressing repairs promptly will help prolong its lifespan and ensure your safety on the water.
Reinforcing The Repair
Repairing a cracked kayak is essential to ensure it remains in top condition for your next adventure on the water. Discover effective techniques and tips to reinforce the repair and keep your kayak in excellent shape.
Once you have successfully repaired the crack in your kayak, it is important to reinforce the repair to ensure its longevity and durability. This step will help prevent future cracks and keep your kayak in top-notch condition. In this section, we will explore two key aspects of reinforcing the repair: ensuring proper adhesion and sanding and smoothing the repaired area.
Ensuring Proper Adhesion
Ensuring proper adhesion is crucial to the strength and effectiveness of the repair. Here’s how you can ensure a strong bond between the repair material and the kayak:
- Clean the repaired area: Before moving forward, thoroughly clean the repaired area with a mild detergent and water. This will remove any dirt, grime, or residue that could hinder adhesion.
- Prepare the surface: Use fine-grit sandpaper to lightly roughen the surface around the repaired area. This will promote better adhesion by creating a textured surface for the repair material to grip onto.
- Apply the adhesive: Following the manufacturer’s instructions, apply a suitable kayak repair adhesive to the repaired area. Spread it evenly, making sure to cover the entire area. This adhesive will provide an extra layer of strength and protection.
- Allow proper curing time: Give the adhesive enough time to fully cure before using your kayak again. This will ensure that the repair is solid and ready to withstand the rigors of the water.
Sanding And Smoothing
After reinforcing the repair, sanding and smoothing the area will not only enhance the appearance but also ensure a seamless finish. Here’s how to achieve a smooth result:
- Inspect the repair: Start by inspecting the repaired area for any rough patches or protruding edges. If necessary, use a fine-grit sandpaper to gently sand down these imperfections.
- Gradually increase grit: Begin sanding with a medium-grit sandpaper and gradually progress to a fine-grit paper. This will help you achieve a smooth finish without damaging the repair or the surrounding kayak surface.
- Apply even pressure: While sanding, apply even pressure to ensure consistent results. Avoid pressing too hard, as this may create unevenness or remove too much material.
- Wipe and clean: After sanding, wipe away any excess dust or debris with a clean, damp cloth. This will give you a clear view of the repaired area, enabling you to make any final adjustments if needed.
By following these steps, you can reinforce the repair of your kayak crack, ensuring it remains strong, durable, and ready for your next adventure on the water.
Finishing Touches
After completing the repair on the kayak crack, it’s time for the finishing touches. This is the crucial step that ensures the repair is durable and visually seamless. The following section will detail the final steps to take after fixing a kayak crack.
Painting Or Sealing
Painting or sealing the repaired area is necessary to protect the kayak from water, UV rays, and general wear and tear. Ensure that the paint or sealant you choose is suitable for the type of material your kayak is made of. Apply the paint evenly, and allow it to dry completely before adding another layer. Make sure to cover the entire repaired area to prevent any moisture from seeping in.
Inspecting The Repair
Once the repair is completed and the paint or sealant has dried, it’s crucial to inspect the repair. Run your hands over the repaired area to check for any unevenness or rough spots. Ensure that the repair blends in seamlessly with the rest of the kayak’s surface. Additionally, inspect the inner side of the kayak to confirm that the repair has effectively sealed the crack and there are no leaks.
Preventative Maintenance
Preventative Maintenance: Taking proactive steps to maintain your kayak can help prevent cracks and damage, saving you time and money.
Avoiding Future Damage
Regular inspection can significantly help in avoiding future damage. Ensure to inspect your kayak thoroughly after each use.
Regular Inspections
- Inspect the hull and deck for any signs of wear or damage.
- Check the seams and joints to ensure they are intact.
- Look for any cracks or dents that may compromise the integrity of the kayak.
Regularly inspecting your kayak can help in detecting potential issues early, preventing the need for major repairs.
Seeking Professional Help
When To Consult A Professional
If the crack is extensive or complex, professional help may be needed.
Understanding Warranty And Service Options
- Review your kayak’s warranty information to explore service options.
- Research local repair shops for skilled kayak technicians.
- Compare pricing and services offered by different professionals.
- Ask about guarantees provided for the repair work.
Frequently Asked Questions For How To Repair Kayak Crack
How To Identify Cracks In A Kayak?
Inspect your kayak for hairline cracks, soft spots, or bubbles in the hull. Scrutinize areas prone to stress such as the keel or around hatches. A crack might also appear as a change in the texture of the kayak’s surface.
What Are The Common Causes Of Kayak Cracks?
Kayak cracks commonly occur due to collisions, impact with hard objects, dragging the kayak on rough surfaces, and excessive exposure to sunlight or extreme temperature changes. Improper storage and transportation can also contribute to crack formation.
Can I Repair A Kayak Crack At Home?
Yes, you can repair a kayak crack at home using a repair kit specifically designed for kayak hulls. These kits typically include fiberglass cloth, epoxy resin, sandpaper, and instructions for easy application. Following the correct procedures and taking your time will allow for a successful repair.
Conclusion
Repairing a kayak crack is crucial for its longevity and your safety on the water. By following the steps mentioned in this guide, you can restore your kayak to its former glory. With the right tools and techniques, your kayak will be ready to hit the water again in no time.