To repair a kayak hole, clean the area thoroughly and apply a patch with marine-grade adhesive. Kayak holes can be fixed with simple DIY techniques using patch kits readily available in outdoor stores.
Whether it’s a small crack or a larger hole, timely repair can prevent water leakage and extend the life of your kayak. We will explore step-by-step instructions on how to effectively repair a kayak hole. By following these easy-to-follow guidelines, you can get back on the water in no time, ensuring a safe and enjoyable paddling experience.
Let’s dive into the process of repairing your kayak and getting it back in top condition for your next adventure.
Assessing The Damage
Repairing a hole in your kayak is essential to keep it in top shape. Learn how to assess the damage and effectively fix it to get back on the water with ease.
Identifying The Hole Size
A crucial step in repairing a kayak hole is determining the size of the damage.
To do this, utilize a tape measure or ruler to measure the diameter of the hole.
Ensure to note down the exact measurements for accurate repair planning.
Determining The Location Of The Hole
Discovering the exact location of the kayak hole is essential for a successful repair.
Inspect both the interior and exterior of the kayak to locate the hole.
Use a flashlight to help identify any hidden or hard-to-see holes.
Preparing The Kayak
Before repairing a hole in your kayak, it is essential to properly prepare the kayak to ensure a successful repair. This involves cleaning and drying the area around the hole to create a suitable surface for the repair material.
Cleaning The Area Around The Hole
- Use a mild detergent and water to clean the area thoroughly.
- Gently scrub the surrounding area to remove any dirt or debris.
Drying The Area Thoroughly
- Allow the cleaned area to dry completely before proceeding.
- Use a clean cloth to ensure the area is free from moisture.
Choosing The Right Repair Material
Before you can start repairing a hole in your kayak, it’s crucial to understand the different types of repair materials available. Each material has its strengths and weaknesses, so choosing the right one can make all the difference in the quality and longevity of your repair.
Selecting The Appropriate Material For The Job
When it comes to selecting the appropriate repair material for your kayak, it’s essential to consider factors such as the location and size of the hole, as well as the type of material your kayak is made from. Here’s a breakdown of some common repair materials for kayak holes:
- Fiberglass Cloth: Ideal for larger holes or structural repairs, fiberglass cloth offers exceptional strength and durability.
- Marine Epoxy: This versatile adhesive is excellent for bonding materials and provides a strong, waterproof seal.
- Plastic Welding Kit: Specifically designed for polyethylene kayaks, a plastic welding kit uses heat to melt and fuse the material, creating a seamless repair.
- Polyethylene Repair Patch: These patches are perfect for quick and easy repairs of small to medium-sized holes in polyethylene kayaks.
- UV-Resistant Sealant: For minor cracks and seam leaks, a UV-resistant sealant can provide a quick and effective fix while protecting against future damage from sunlight.
Based on the size and location of the hole, you can now select the most appropriate repair material for the job. Consider the compatibility of the material with your kayak, as well as its strength, flexibility, and ability to withstand water exposure. It’s crucial to ensure the chosen material will create a secure and watertight seal to prevent further damage and keep you safe on the water.
Repairing The Hole
Learn how to effectively repair a hole in a kayak with these step-by-step instructions. Keep your kayak in top shape and hit the water with confidence.
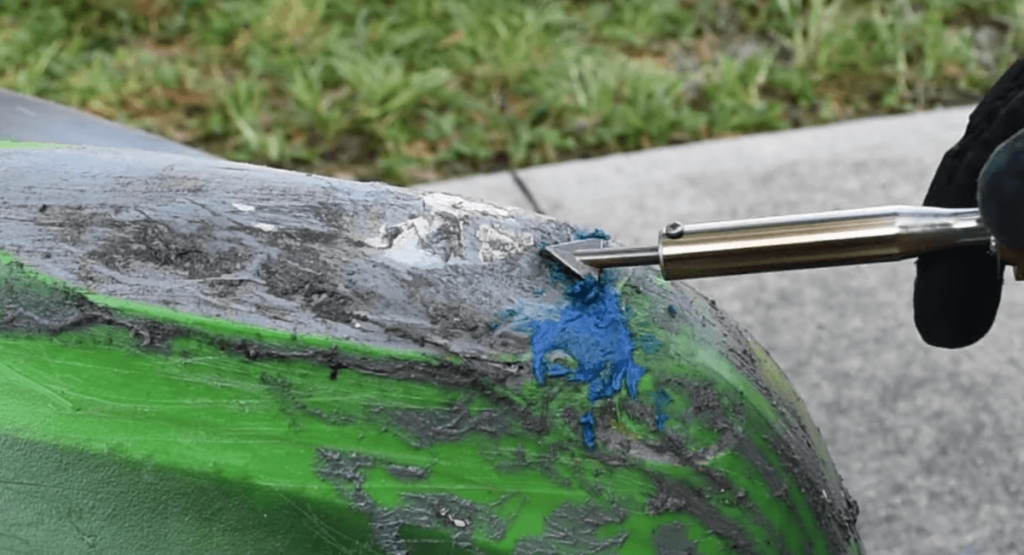
Repairing the Hole: H3: Filling the Hole with Repair Material To repair a hole in your kayak, the first step is to fill it with a suitable repair material. There are several options available, including epoxy putty, fiberglass patches, or specially formulated kayak repair kits. The chosen material should be suitable for the type of kayak you own and the size of the hole.
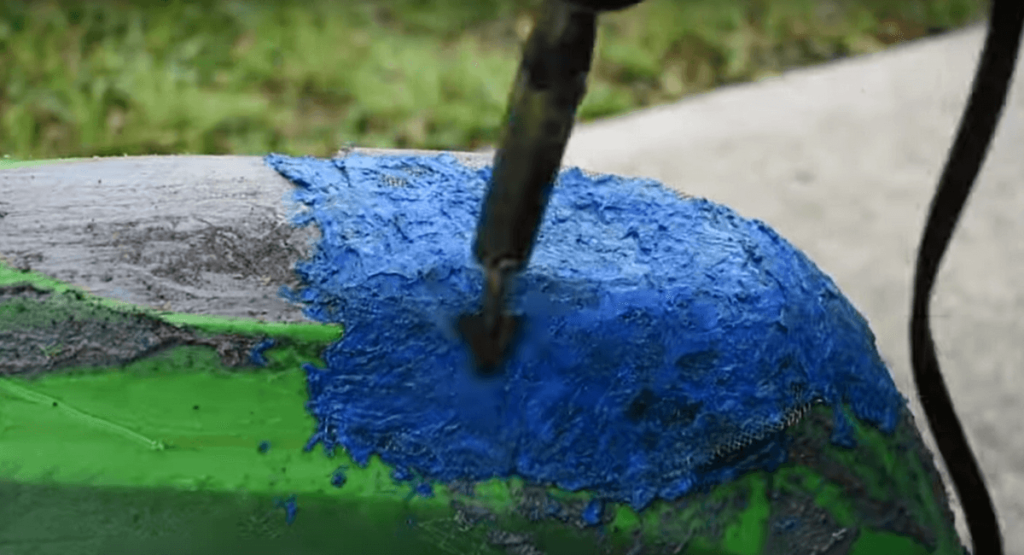
If you opt for epoxy putty, start by cleaning and drying the damaged area. Then, cut off a small piece of putty, knead it to activate the chemicals, and apply it to the hole. Smooth the putty over the hole, making sure it fills the entire area evenly. Use a putty knife or your fingers to achieve a flush and seamless repair. In the case of fiberglass patches, you’ll need to cut a piece of fiberglass cloth slightly larger than the hole.
Then, mix the epoxy resin as per the manufacturer’s instructions and apply a thin layer to the damaged area. Next, press the fiberglass patch firmly onto the area, making sure that there are no air bubbles trapped beneath it. Coat the patch with the epoxy resin to ensure a strong bond and a watertight seal. H3: Applying Pressure and Allowing Time to Cure Once you have filled the hole with the repair material, it is crucial to apply even pressure to ensure a secure and long-lasting repair. Wrap the repaired area with a circularly overlapping layer of duct tape or use a weight to hold it down.
This pressure will help the repair material adhere firmly to the kayak and create a strong bond. After applying pressure, you need to allow sufficient time for the repair material to cure properly. The curing time may vary depending on the type of repair material used and the environmental conditions.
Refer to the instructions provided with the material for specific guidelines on curing time. During the curing process, ensure that the kayak is kept in a well-ventilated area with a stable temperature. Avoid exposing it to extreme heat or cold, as this can impact the effectiveness of the repair. In conclusion, repairing a hole in your kayak involves filling the hole with a suitable repair material, applying pressure to ensure a secure bond, and allowing ample time for curing.
By following these steps carefully, you can effectively repair the hole and restore the integrity of your kayak. Remember to always consult the manufacturer’s guidelines and use appropriate safety measures during the repair process.
Sanding And Finishing
Once you have successfully repaired the hole in your kayak, it is important to properly sand and finish the repair to ensure a smooth and seamless result. Sanding the repair area will help create a flush surface while applying a protective coating will safeguard your kayak from any potential damage. Let’s take a closer look at these steps in detail to achieve professional-looking results:
Sanding The Repair Area
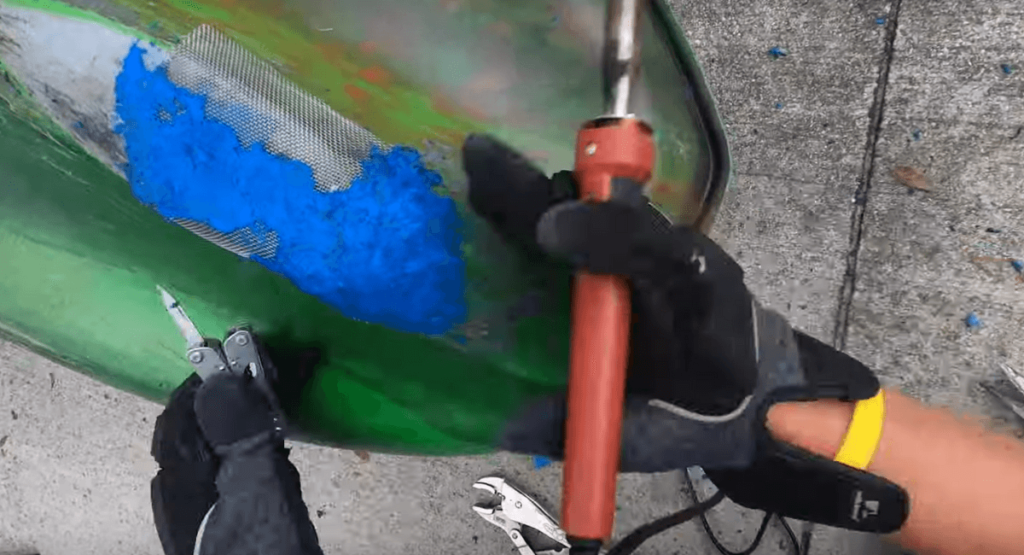
Sanding the repair area is an essential step in achieving a smooth and flawless finish. It helps to create a flush surface that seamlessly blends with the rest of the kayak. To begin, gather some sandpaper with a grit between 180 and 220. Starting with a lower grit sandpaper can help remove any excess material and gradually move towards a finer grit for a polished result.
When sanding the repair area, it is important to evenly distribute the pressure and use a circular motion. This ensures an even surface and eliminates any visible ridges or bumps. Be sure to continuously check the progress by running your fingers over the repaired area to identify any uneven spots that need additional sanding.
Remember, the goal of sanding is to smoothen the area, so avoid excessive sanding that could damage the surrounding kayak surface. Take your time with this step to achieve optimal results.
Applying A Protective Coating
After sanding, it is crucial to apply a protective coating to the repaired area to enhance durability and provide long-lasting protection against water and UV rays. There are various options available in the market, such as marine-grade epoxy or a specific kayak repair resin. Choose a coating that best suits your kayak’s material and provides a strong bond.
Before applying the protective coating, ensure the repair area is clean and free from dust or debris. Use a microfiber cloth or a soft brush to remove any particles that may compromise the adhesion of the coating.
Once the area is clean, carefully follow the instructions provided with the chosen protective coating. Apply an even coat using a brush or roller, being careful not to exceed the recommended thickness. Allow the coating to dry completely as per the manufacturer’s instructions, and if necessary, repeat the process to ensure maximum protection.
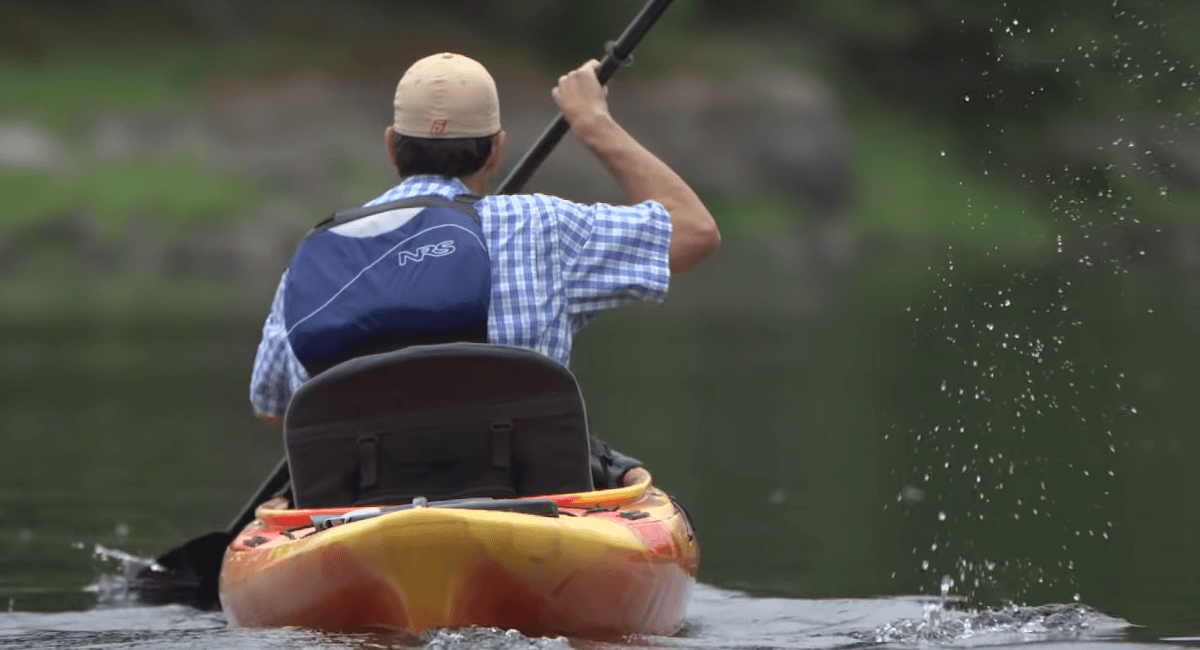
By sanding the repair area and applying a protective coating, you can achieve professional-looking results and restore the integrity of your kayak. With these steps completed, your kayak will be ready for your next adventure on the water!
Inspecting The Repair
After completing the repair on your kayak hole, it is crucial to thoroughly inspect the repair to ensure its effectiveness. This will involve checking for any leaks and assessing the overall integrity of the repair.
Checking For Leaks
To begin the inspection process, start by placing the kayak in the water and observing it for any signs of leakage. Carefully watch the area that was repaired for any air bubbles or water seepage. Additionally, run your hand along the inside and outside of the repaired area to feel for any moisture or leaks. If there are no signs of leakage, proceed to the next step. If leaks are detected, further repairs will be necessary.
Assessing The Overall Integrity Of The Repair
Once you have confirmed that there are no leaks, it is important to assess the overall durability and strength of the repair. Gently press on the repaired area to ensure that it feels solid and does not give way. Examine the area from different angles and under varying light conditions to check for any imperfections or weaknesses. It’s also important to test the repaired kayak on the water under regular use to ensure the repair holds up under normal conditions.
Testing The Kayak
Performing A Water Test
Fill the kayak with water and look for drips. Inspect for any leaks by turning the kayak over to see if any water escaping.
- Check the repaired area first for any signs of leaking.
- Ensure no additional holes are formed during the repair process.
Ensuring The Repair Holds Under Pressure
Apply pressure to the repaired area by pushing it firmly. Look out for any signs of stress or separation.
- Press along the edges of the repair to check for any weakness.
- Apply extra weight to the repaired area to test its durability.
Maintenance Tips
To repair a hole in your kayak, start by cleaning the damaged area with soap and water. Once dry, apply a marine-grade epoxy or adhesive specifically designed for kayak repairs. Make sure to follow the instructions carefully for a strong and durable fix.
Finally, let the epoxy cure and your kayak will be ready for the water again.
Maintenance Tips are crucial to extend the lifespan of your kayak and ensure optimal performance. By following simple guidelines, you can prevent damage and keep your kayak in top condition. Regular inspections, proper storage, and careful transportation play vital roles in kayak maintenance.
Regular Inspections
Inspect your kayak for any signs of wear, tear, or damage after each use. Look for cracks, scratches, or holes that may compromise its integrity. Repair any damages promptly to prevent further issues.
Proper Storage And Transportation
When not in use, store your kayak in a cool, dry place away from direct sunlight. Use a kayak cover to protect it from dust and UV rays. During transportation, secure the kayak properly to prevent shifting or damage.
Frequently Asked Questions Of How To Repair Kayak Hole
How Do I Identify A Hole In My Kayak?
To identify a hole in your kayak, inspect the interior and exterior for any visible cracks and listen for air escaping. Additionally, you can fill the kayak with water and look for any leaks.
What Are The Common Causes Of Kayak Holes?
Common causes of kayak holes include impacts with rocks or sharp objects, improper handling, and wear and tear over time. It’s important to regularly inspect and maintain your kayak to prevent these issues.
Can I Repair A Kayak Hole At Home?
Yes, you can repair a kayak hole at home using a kayak repair kit. This typically includes a patching material, adhesive, and instructions for application. It’s important to follow the directions carefully for a successful repair.
When Should I Seek Professional Help For Kayak Repair?
If the hole is large or significantly compromises the structural integrity of the kayak, it’s best to seek professional help. Professional repair services have the expertise and equipment to handle more extensive damage.
Conclusion
Repairing a kayak hole can be a simple yet crucial task for kayak maintenance. By following the steps and tips mentioned in this guide, you can effectively mend any hole in your kayak and get back on the water quickly.
Remember to take your time, use the right materials, and prioritize safety. Happy kayaking!